This is part two of our series where we are going to walk through a full stack development exercise that we have put together for our Unosquare University curriculum. With our internal University we are creating a place where we can centrally house various courses and learning materials for the technologies where our teammates excel. Some of our curriculum has been helpful to software development professionals outside of Unosquare, and we hope that you find this interesting and helpful.
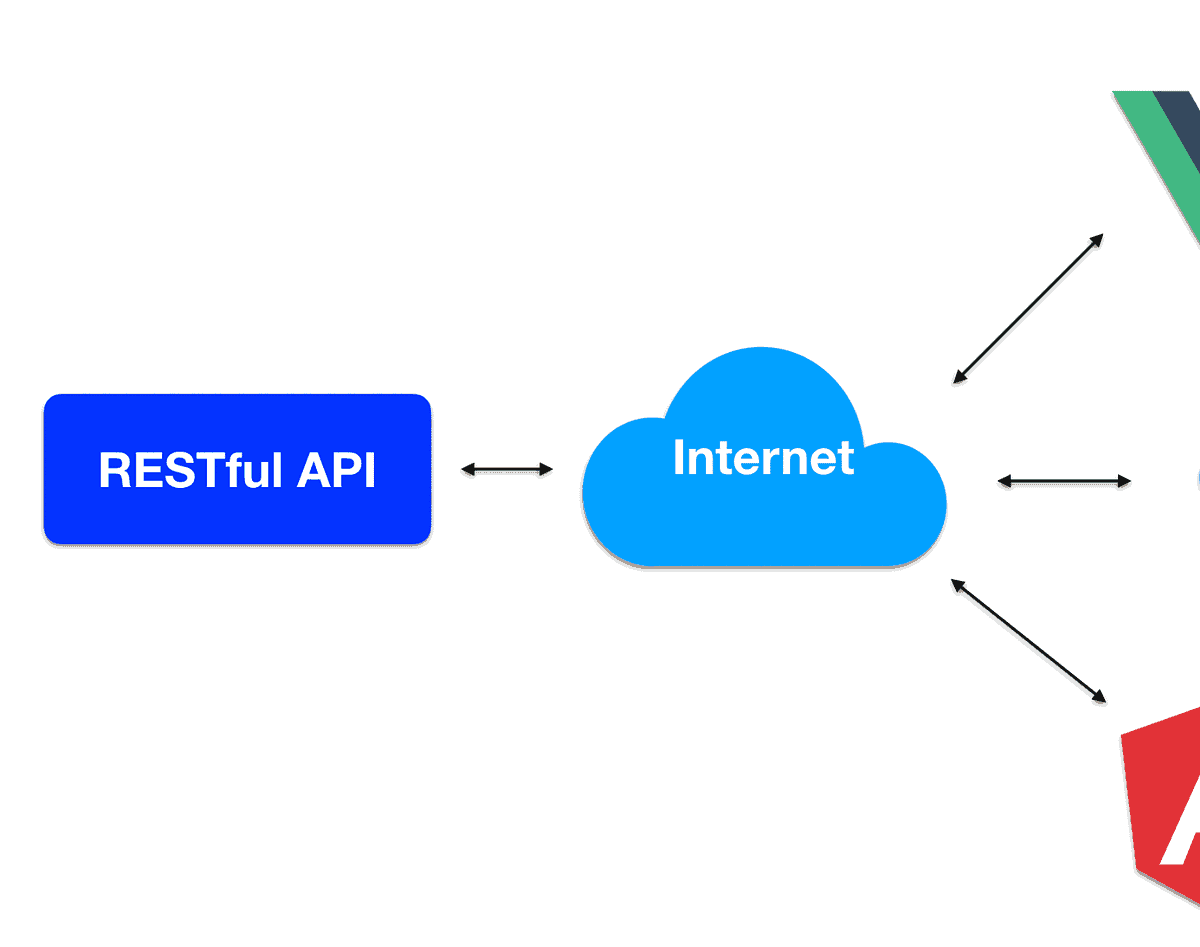
This post is the second in our series on RESTful API building. Remember that our goal is to create a RESTful API using Java EE and three UI applications using some of the most popular JavaScript frameworks/libraries – AngularJS, ReactJS and VueJs.
In part one we ended with a working API and now we are going to create our database using MySQL 8.0. Now, you may notice that the file names in some of the images in this post are in Spanish, but we think that this is easy enough to follow along. The development talent at Unosquare is bilingual, and so are our File Explorers ; )
PERSISTENCE
We want our database to be durable, able to change with devices and software. Therefore, we are going to create a persistent database so that our data is stable and recoverable.
Database
As we mentioned in the introduction, we are going to create our database using MySQL 8.0. Here is an image of our table.

Data Source: GlassFish
We’ll take advantage of our GlassFish container to set a data source which will be used by our application.
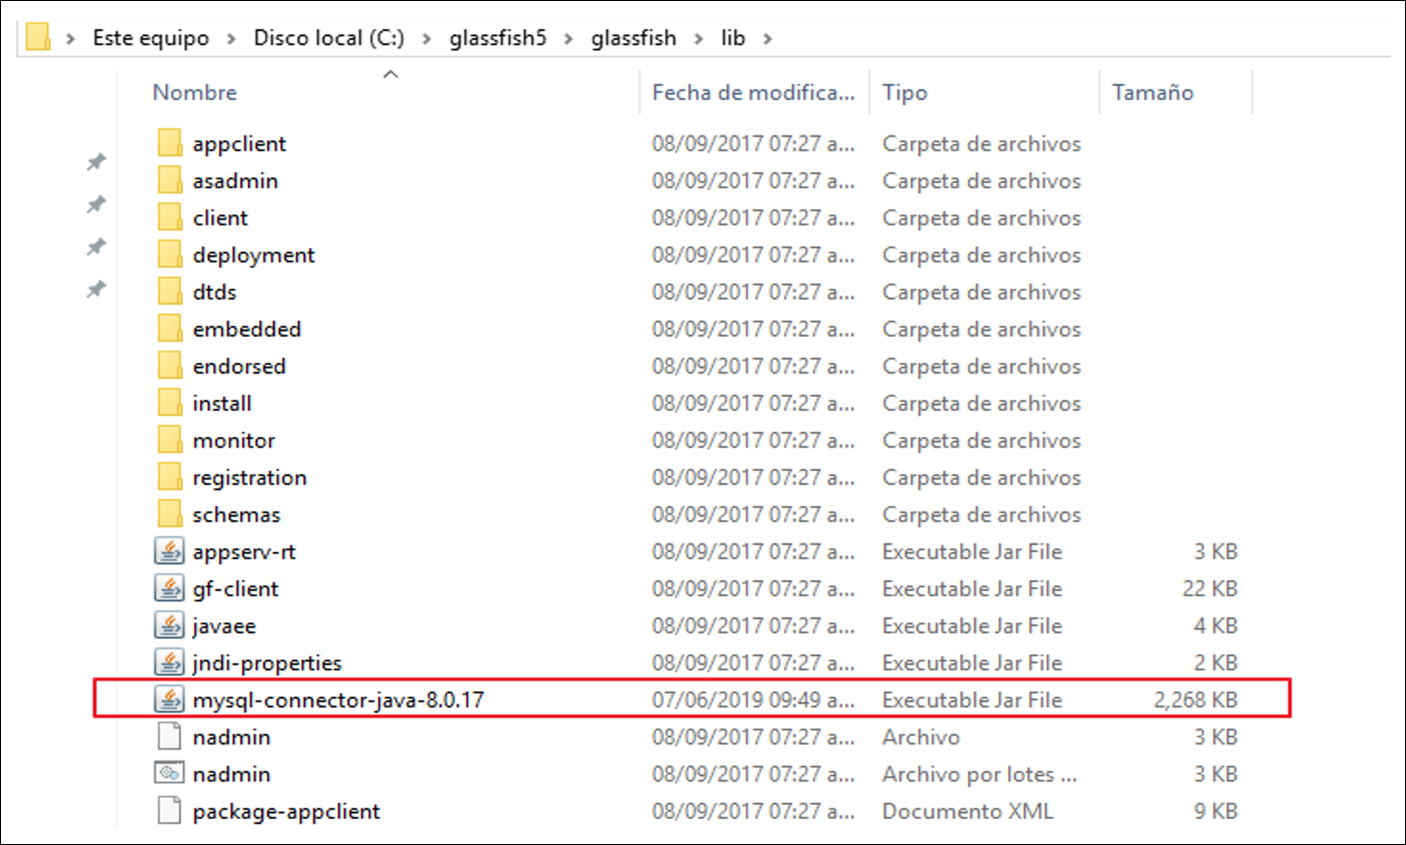
1. First and foremost, you have to add your mysql-connector (or whatever connector you wish to use) jar file to GlassFish.
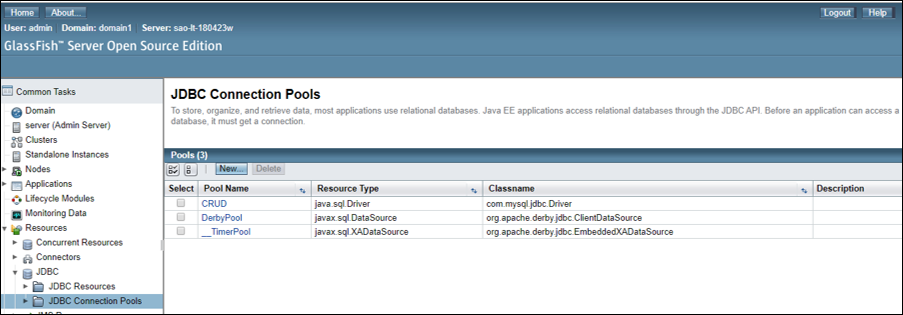
2. Go to http://localhost:4848
3. Create a new connection pool:
4. Add your connection settings:

5. Create a resource with your recently created connection pool:
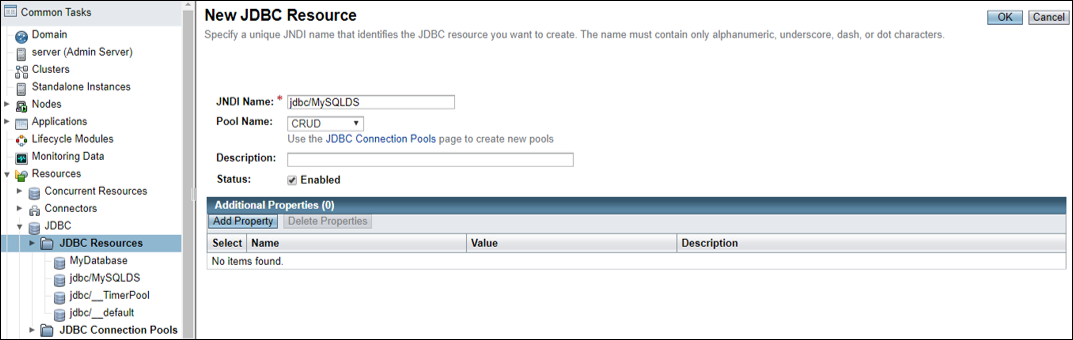
And, that’s it! We now have our data source.
Persistence.xml
To add persistence to our project:
1. Project->right click->Properties-> Project Facets->JPA->Further configuration available:
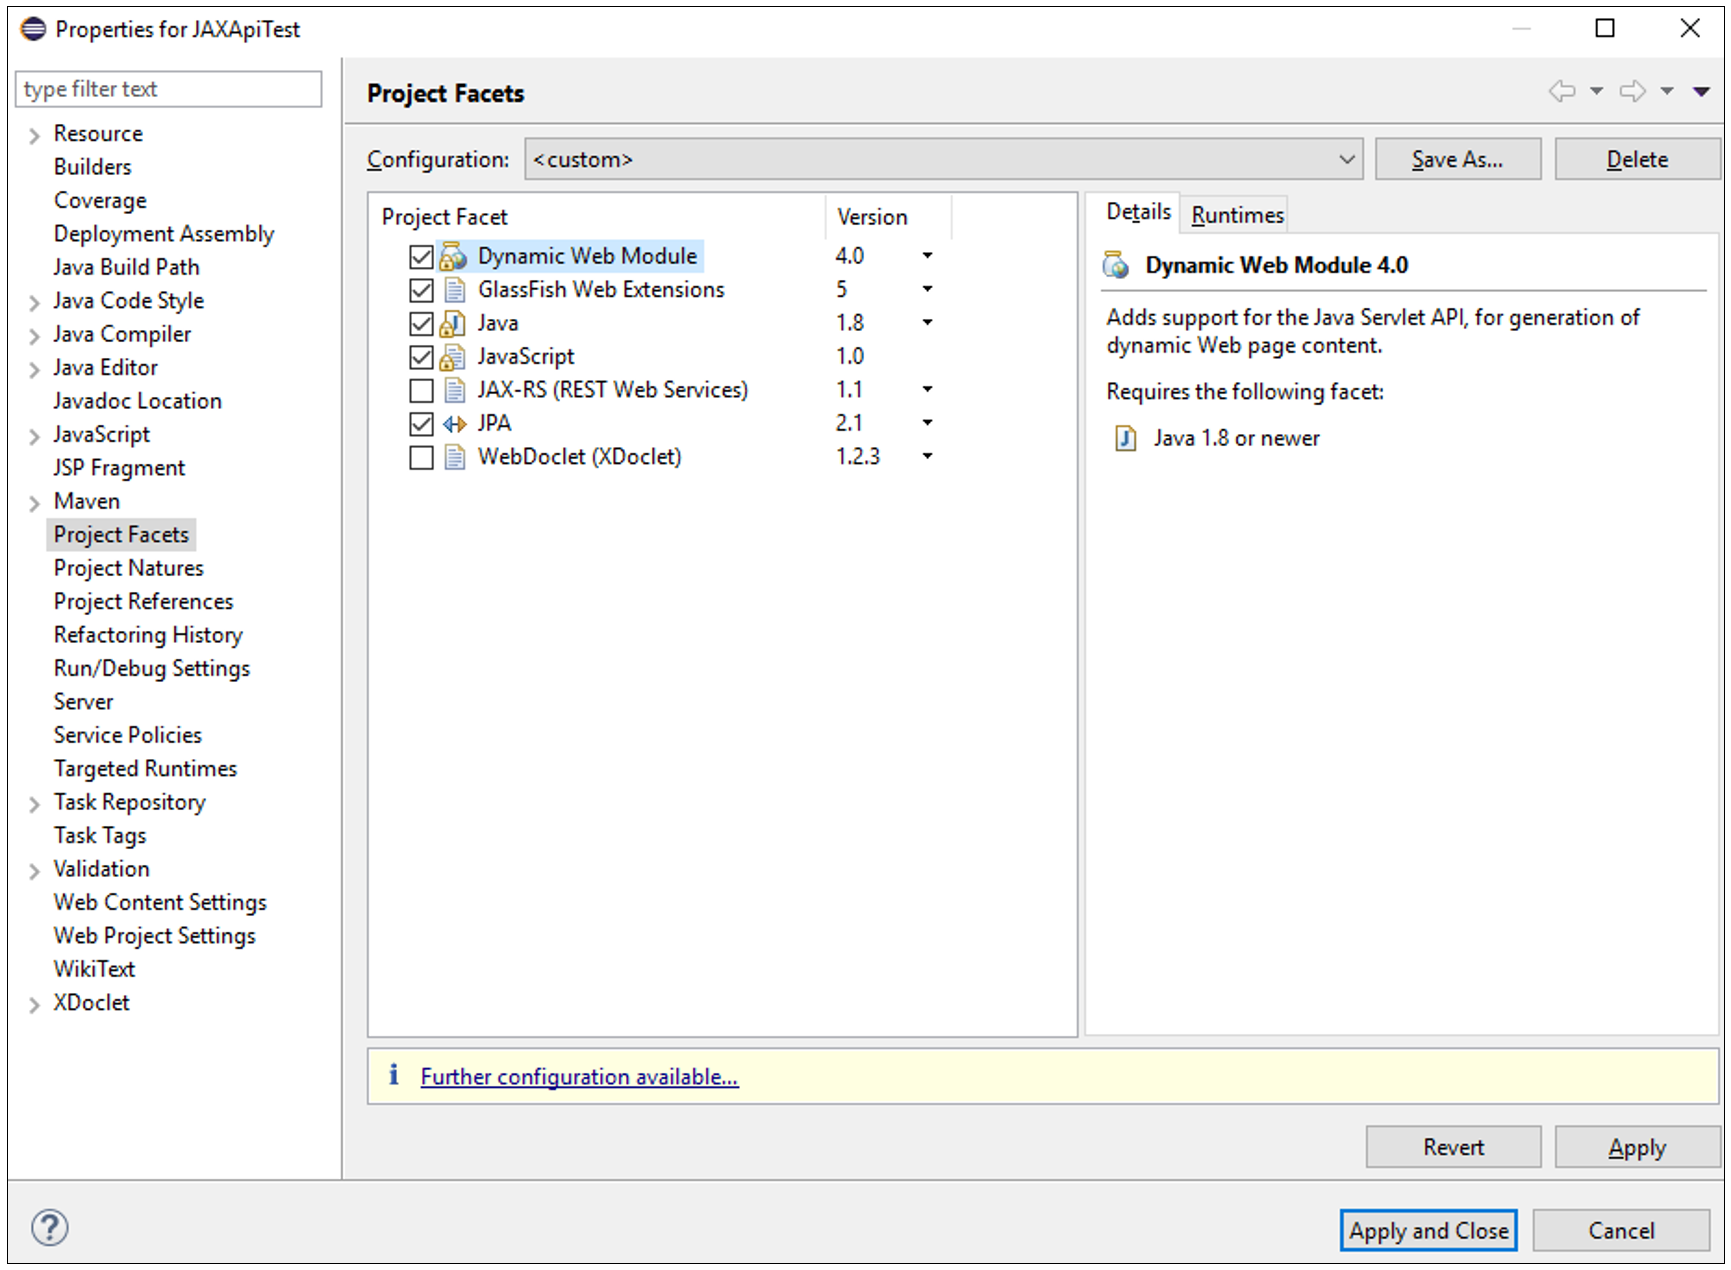
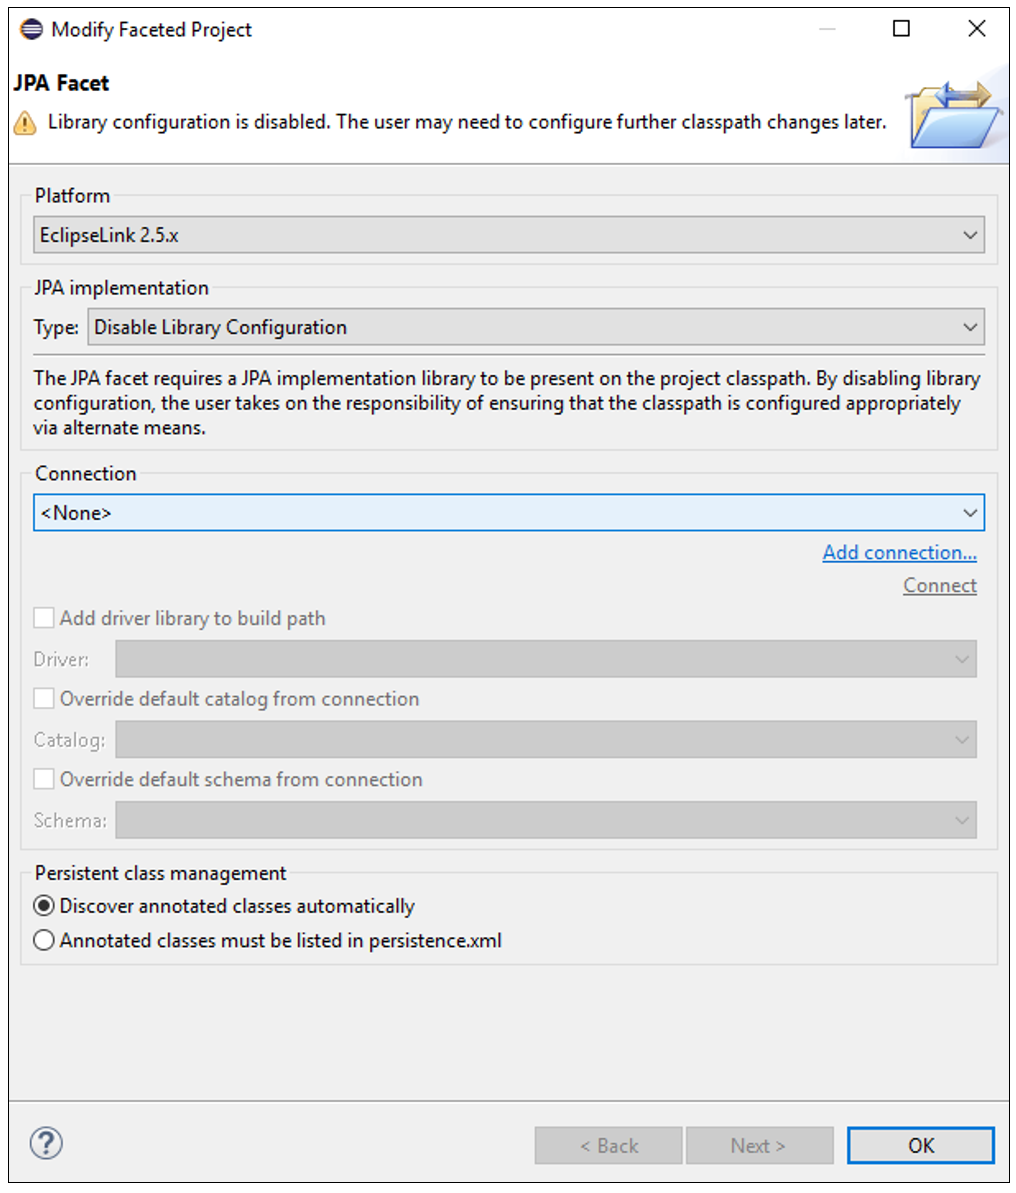
2. Click “OK” and Apply and close.
You’ll now see a persistence.xml under JavaResources/META-INF folder:

Here is how to edit this file:
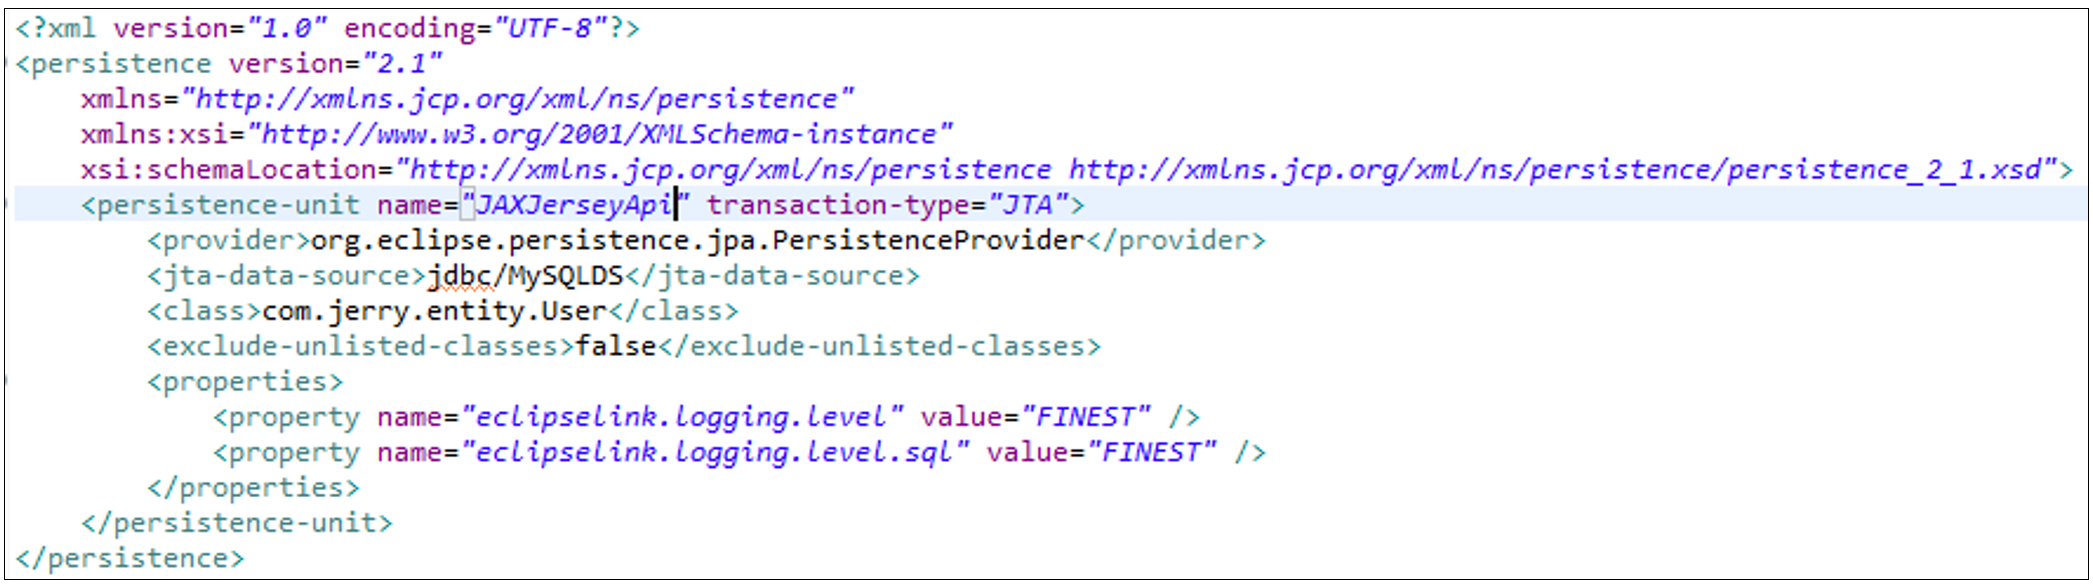
At this point, here are some important notes to consider:
Persistence-unit name=”name of your unit will be used in your app”
Persistence-unit transaction-type=”JTA” (Java Transaction API) means we will use container to manage all transactions lifecycle.
<jta-data-source> Our Datasource name, previously configured in Glassfish Containe
<class>Our classes that will use persistence.
Now, let’s implement JPA in our application by creating and Entity Class
1. Create a package (i.e. com.rest.entity) and create a User.java classs like this:
https://github.com/jerrydevelopermx/java-rest-jersey-api/blob/master/src/com/jerry/entity/User.java
2. We are going to create a PersistenceService.java class into a new package (i.e. com.ret.util) that implements JPA Entity Manager
We implemented the five operations, getAll, GetByUSerId, update, create and delete User
3. Now, we can use this service into our Rest UserService.java class:
Now, we have the four main verbs for for our RESTful API: GET, PUT, POST and DELETE
FINAL STEP: Enabling CORS (Cross-Origin Resource Sharing)
We already have our RESTful API running, but we are missing an important detail. We need to enable our application to receive requests from different origins and configure what kind of requests and formats could accept.
This is very important. If this is not set up correctly, communication between the back-end and the front-end will not be established
To do this we will create a new package (i.e. com.rest.security) and we will add a new class:
Finally, add the new package into the init-param section in you web.xml file:
https://github.com/jerrydevelopermx/java-rest-jersey-api/blob/master/WebContent/WEB-INF/web.xml
UI Apps
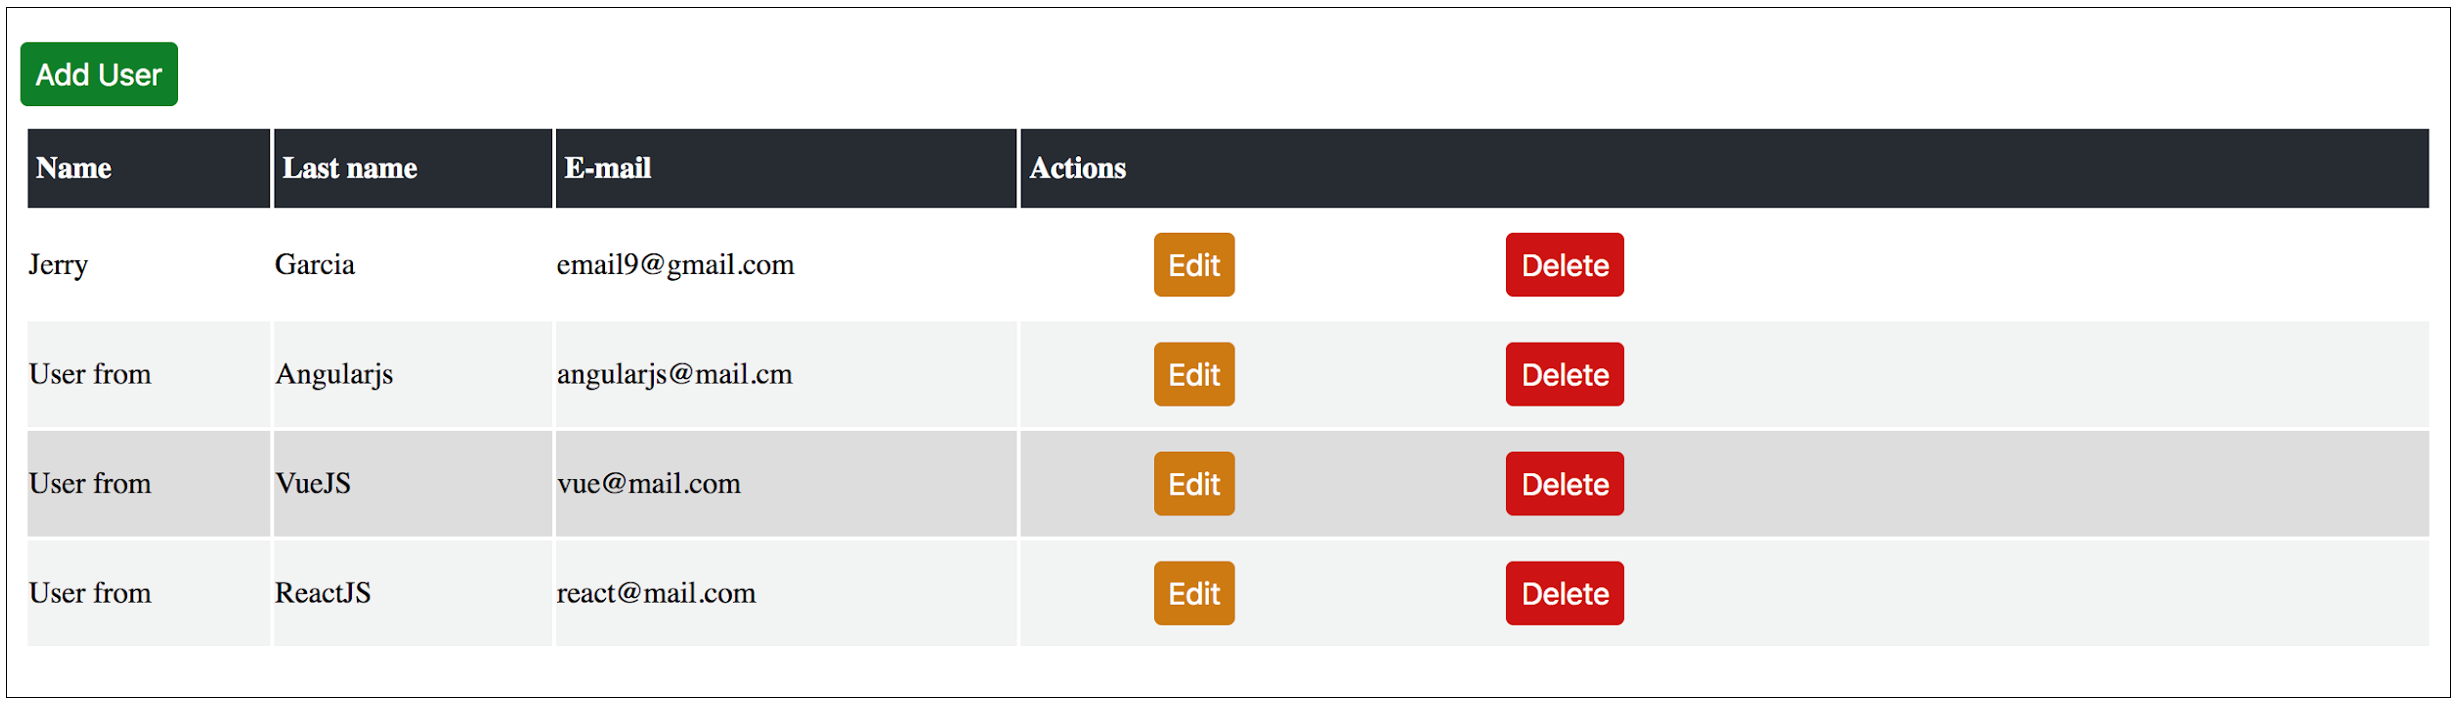
- We are set to begin working with our UI applications. The goal is to create three UI applications that consume our RESTFul API (CRUD operations) using some of the most popular UI frameworks/libraries.
Users list view: (GET users, DELETE user by ID)
In Conclusion for this post…
Let us know what you think of this process so far by using the “Comments” section below this post. We have more to come to complete this series.